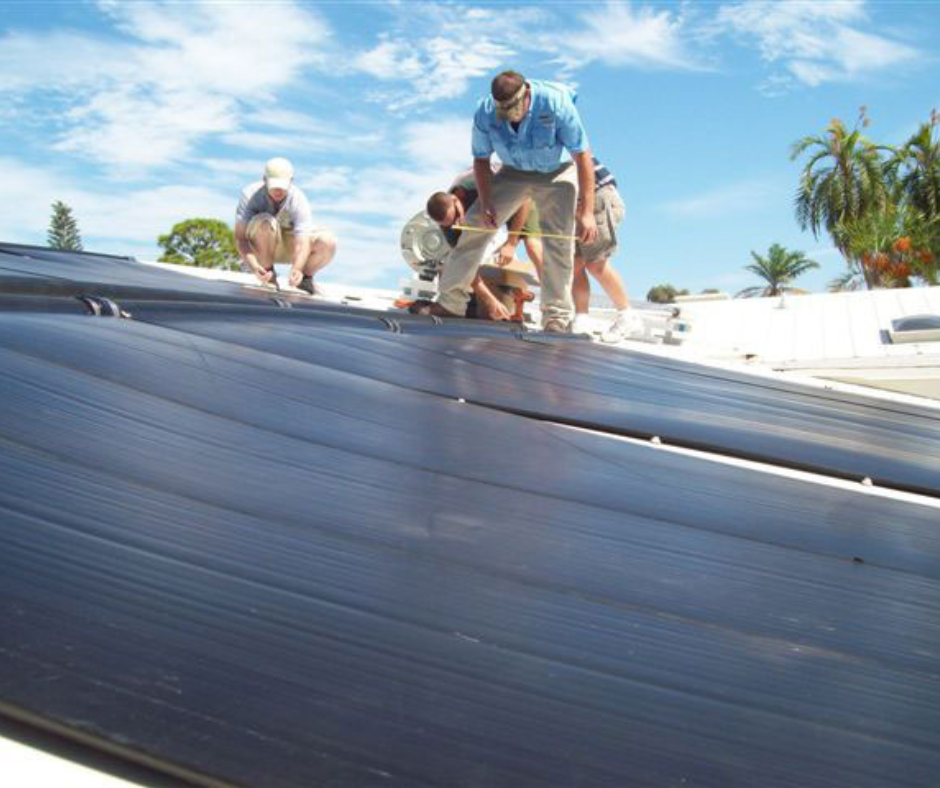
Installing your own solar pool heating system can save thousands in labor costs while giving you complete control over the project. With proper planning and quality components, many homeowners successfully complete this installation in a weekend.
This guide walks you through everything you need to know, from initial planning to firing up your new system.
Is DIY Installation Right for You?
Before jumping in, honestly assess whether this project matches your skill level. DIY installation works well if you’re comfortable with:
- Basic plumbing and PVC pipe work
- Working safely on your roof
- Following detailed instructions
- Using common tools like drills and saws
Most systems take a weekend to install, though larger or more complex setups may need extra time.
Planning Your System
Sizing Your Solar Collectors
Your collector area should equal 50-100% of your pool’s surface area. For example, a 400 square foot pool needs 200-400 square feet of collectors.
Use the lower range in warm, sunny climates. Use the higher range in cooler areas or if you want really warm water.
Choosing the Best Location
Look for a spot that faces south with good sun exposure from 9 AM to 3 PM. East or west orientations work too, just not quite as well. Your roof pitch should be between 15-45 degrees, though flat installations also work fine.
Measure your available space carefully. Account for roof obstacles like vents or chimneys. Leave room between panels for maintenance and thermal expansion.
Selecting Quality Components
Good components make all the difference in performance and longevity. Heliocol and Sun Elite collectors are excellent choices for DIY projects because they’re designed with homeowner installation in mind.
Both brands include clear installation manuals and feature designs that make connections easier and more reliable.
What You’ll Need
Essential Tools
- Drill with various bits
- Circular saw or reciprocating saw
- PVC pipe cutter
- Adjustable wrenches
- Measuring tape and level
- Safety gear (harness, non-slip shoes)
Installation Materials
- Solar collectors (properly sized)
- Mounting hardware and roof flashing
- PVC pipe and fittings
- Three-way valve for flow control
- Automatic controller (highly recommended)
- Pipe insulation
- PVC primer and cement
Most DIY kits include the major components. You’ll usually need to pick up some plumbing materials locally.
Installation Steps
Step 1: Prepare Your Roof
Mark where your collectors will go, ensuring proper spacing between panels. Most need 1-2 inches between collectors and adequate clearance from roof edges.
Install mounting hardware into rafters (not just roof decking) using proper flashing to prevent leaks. Take your time here – good mounting prevents problems later.
Step 2: Install the Collectors
Start with collectors closest to your pool equipment. Heliocol panels use special clamps that make connections simple. Sun Elite collectors have overmolded headers that reduce leak potential.
Follow the manufacturer’s layout patterns exactly. Proper flow distribution ensures even heating and prevents air pockets.
Step 3: Run the Plumbing
Route supply and return lines from your pool equipment to the collector array. Use properly sized PVC pipe – undersized plumbing hurts performance.
Install the three-way valve that sends water to collectors when heating is needed. This can be manual or automatic depending on your controller.
Step 4: Install the Controller
An automatic controller makes your system much more efficient by monitoring temperatures and operating the valve automatically. Install temperature sensors exactly where the instructions specify.
Wire the controller according to local electrical codes. Many controllers include freeze protection features for cold climates.
Step 5: Test Everything
Fill the system slowly, checking every connection for leaks. Start with low pressure and gradually increase to full operating pressure.
Test your automatic controls. The system should turn on when the collector temperature is 8-10 degrees warmer than your pool water.
Common Challenges and Solutions
Roof Safety
If you’re not comfortable working on roofs, consider hiring professionals just for the mounting portion while handling the ground-level plumbing yourself.
Getting Pipes to the Roof
Running pipes from pool equipment to roof collectors often requires creative routing. Plan your path carefully to minimize bends and provide proper support. Insulate exposed pipes.
Balancing Water Flow
Larger systems may need flow balancing to ensure even water distribution through all collectors. This involves adjusting flow rates using valves.
Getting the Best Performance
Maximize Sun Exposure
Position collectors for the best sun throughout the day. Even small amounts of shade can hurt performance significantly.
Use Proper Pipe Sizes
Don’t skimp on pipe size – it’s a common mistake that reduces heating performance. Follow manufacturer recommendations.
Set Up Your Controller Right
Program temperature differentials correctly: typically 8-10 degrees to turn on, 3-4 degrees to turn off. This prevents the system from cycling on and off too frequently.
Maintenance Planning
Design your installation with future maintenance in mind. Make collectors accessible for cleaning and include drain valves in low spots for winterization if needed.
Both Heliocol and Sun Elite systems need very little maintenance, but accessible installations make any required service much easier.
Cost Savings
DIY installation typically saves $2,000-5,000 in labor costs. Combined with energy savings, your payback period often drops to just 2-3 years instead of 4-5 years for professional installation.
Quality components are essential for these savings. Cheap collectors might save money upfront but often need replacement much sooner.
When to Call the Pros
Some situations benefit from professional installation:
- Complex roof layouts with multiple levels
- Electrical work beyond basic controller installation
- Local codes requiring professional installation
- Lack of proper tools or safety equipment
Even getting help with just the roof work while doing the plumbing yourself can be a good compromise.
Getting Started
Solar Pool Warehouse provides complete DIY kits with detailed instructions for both Heliocol and Sun Elite systems. Our kits include all major components plus step-by-step guides designed specifically for homeowners.
We also offer technical support throughout your installation. Our experience helps DIY installers avoid common mistakes and get professional-quality results.
Ready to start your DIY solar pool heating project? Contact Solar Pool Warehouse to discuss system sizing and get the components you need for a successful installation.
If this doesn’t feel right for you, reach out to professionals. We have experts ready to help with installation. Visit our partner Celestial Solar’s professional installation services for experienced technicians who can handle your entire project.